Style a console with Rae West art

One of our favourite artists, Rae West, just happens to live right on our doorstep - Hawke's Bay is full of so many talented people! When she recently offered us one of her spectacular original tondo's for our showroom, we jumped at the chance. Her work is super beautiful, she uses resin and ink, and this particular piece also has gold leaf for an extra layer of subtle shine. It's quite hard to capture the beauty on camera, believe me when I say this art is even better in 'real life'.

We decided to combine Rae's piece with a little styling demo, and show you how we styled the console in our showroom in six simple steps. Styling flat surface like consoles, coffee tables and bookshelves is one of our favourite things to do. In my home I'm constantly changing things around to suit a new piece I've found, or just to keep things fresh and interesting.

It can be hard to know how to get the right balance, and how to make it look pretty but also have functionality. To help you get started (if you're new at this), we'll run you through our steps and explain why we've used certain pieces:

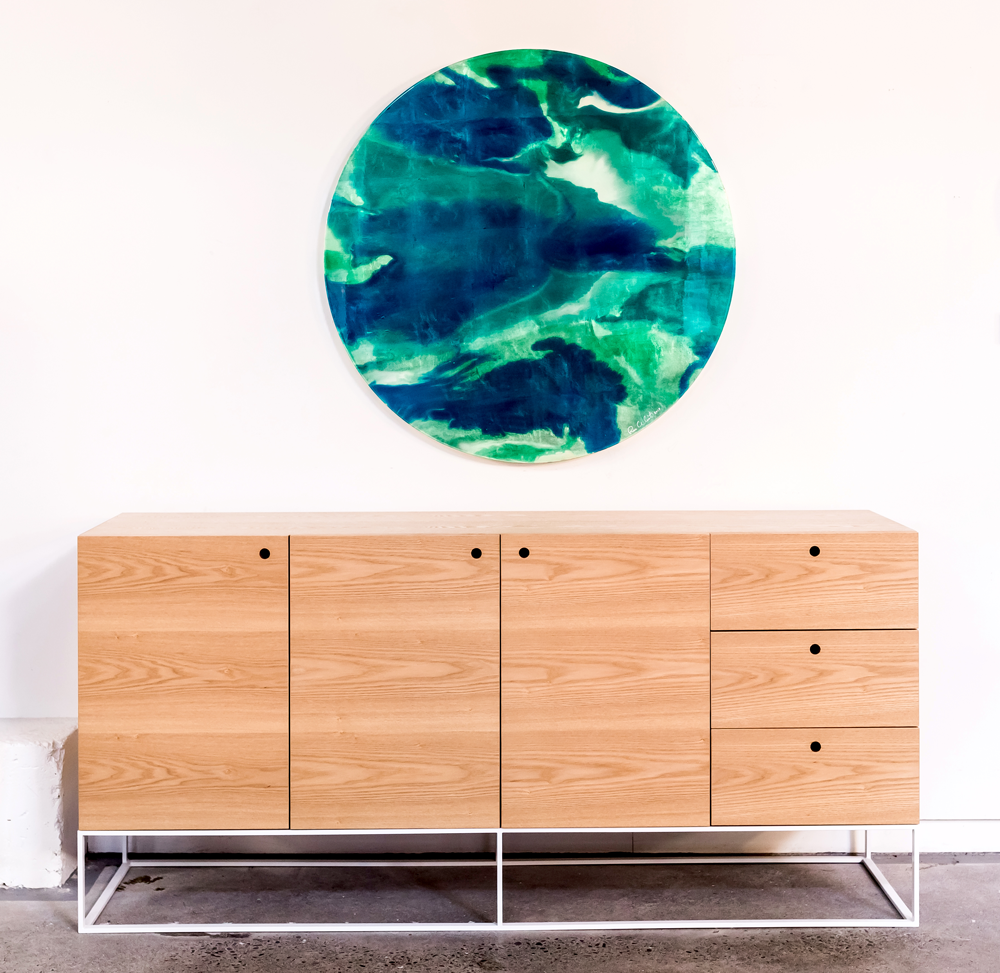
Step 1: We like to start with a large piece of art, or a mirror can look great too. Hang it just above your console - too high and it can look disconnected from what's going on below it.

Step 2: A lamp is a great starting point. It adds height as well as light for functionality. We've chosen a lamp with a fabric shade we had custom made. The shade will soften the light rather than having directional light like a desk lamp.

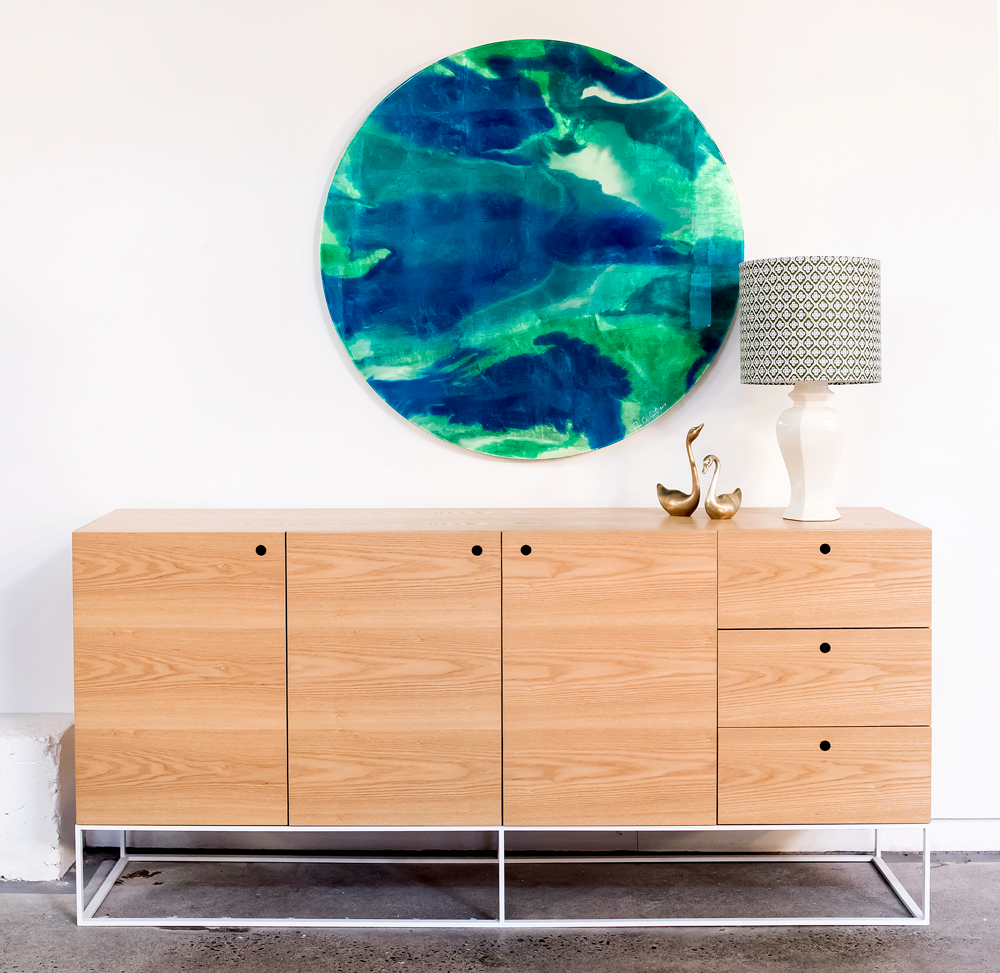
Step 3: Add something sculptural or quirky, purely for fun. We liked the curves of the swans next to the round artwork and the curve of the lamp. The brass links to the subtle gold found in Rae's artwork (although it's hard to capture this on camera).

Step 4: Books are a great tool for grounding objects, they act like a little platform for smaller pieces like bowls or vases. They also add a bit of weight and squareness to balance the curves. If you're anything like me (book crazy!) you'll love the chance to have some of your favourite coffee table books on display.

Step 5: To balance the right side we added a large floral arrangement. It's always great to add fresh flowers or greenery. They bring life and add another sculptural and textural element. We were lucky enough to have this stunning arrangement by Laura Jeffares, but if you don't have access to Laura, a pot plant in a beautiful planter will do the job, or grab your secateurs and snip some greenery from your garden.

Step 6: We could've left it at that last step, but that little space to the right of the vase felt like it needed something. A little dish, bowl or tray is handy for throwing your keys, sunglasses etc in as you walk in the door. It's a functional piece and also another low, horizontal element to balance the height of the vertical pieces - it's all about the balance.

So there you go, six simple steps to create a pretty good looking console. We've kept our colour palette consistent with greens and blues to compliment the artwork, and pinks, gold, and the light wood of the console to balance those cool tones.

This beautiful artwork is for sale, so if anyone is interested in purchasing a stand out piece for their home, please get in touch with us. You're welcome to come and see the art in our showroom so you can truly appreciate it's beauty. Make an appointment to make sure we're not in a meeting or out and about, as we'd love to give you our full attention.

Exhibit your personality with GIB-Cove®

Dael and I wanted to share a project with you that we've had so much fun with and are very proud to have worked on. It's a campaign for GIB® to promote their new range of GIB-Cove®. With five different cove profiles available, you can choose the one which best suits your style and your personality, whether that is modern and minimal, more traditional, or something in between. Coving is an important architectural detail in your home and deserves as much consideration as any other piece you'd choose for your room. We worked with the amazing team at justONE in Auckland who created the campaign and the five different personalities to represent each cove. We designed a living room for each personality that we felt worked beautifully with the chosen GIB-Cove®.

Behind the scenes

We were able to fly up to Auckland to create one of the rooms we designed, and it was amazing to see the room come to life. We designed the room for Mason (and his dog Rusty) to suit his laid back lifestyle and personality. The contemporary lines of the Mezzo GIB-Cove® complimented the room beautifully.

The other four rooms we designed have been turned into fabulous illustrations. Make sure you check them all out on the Gib® website and click on each style to see how to 'get the look'.

A special thanks to all our suppliers whose products we've used in our room designs, but especially to those who allowed us to use their products for Mason's photo shoot - Soren Liv, The Ivy House, Maytime, The Poi Room, Bianca Lorenne, Torpedo7, Carpet Court, and Black Bridge Nurseries. If you're interested in any of the amazing products we've featured you can also purchase through us, just give us a call or fire through an email. And if you're interested in using the GIB-Cove® in your home talk to your local, architect, interior designer, or builder about the range.

Kitchen Makeover

As interior designers it's a blessing to work with amazing clients who trust in your designs and follow them through. One such client is Fiona, whose living and dining rooms we've already transformed. Fi has great taste but came to us to help her narrow down her options and create a home that would reflect her cool and eclectic style.

We recently finished a complete kitchen renovation giving Fi a modern kitchen with lots of extra storage while still in keeping with her cottage's traditional bones. Once again we worked with Rick and his team at Sunshine Joinery, whose workmanship is fantastic. The tiny two bedroom cottage had an equally tiny kitchen between the entrance and dining room. Although small, it was in proportion with the house, but it just felt a bit tired and in need of some TLC.

We lightened and brightened the space with all white cabinetry and bench top. The panelled cabinetry adds subtle texture and helps it to fit in with the traditional cottage surrounds. Negative detail handles also keep the kitchen humble and not too flashy.

Fi bought the pink Smeg fridge before we started designing the kitchen, so that was a key component for us to work the design around. That was another reason to keep the kitchen light and white to allow the fridge to be the hero. Wooden shelves and a Turkish rug also bring a touch of warmth to the space.

An old wall cupboard was replaced with open shelves so Fi could display some favourite pieces and add touches of her personality.

In a small space it's crucial to utilise all available space wisely, especially vertical space, so we filled the wall above the fridge with cupboards. We chose to use handleless cupboards above so we could keep the small space clean and unfussy. We moved the oven and cooktop around to this wall allowing room for a single dish drawer where the oven once was. Initially we priced up a stone bench top, but to keep within budget we decided on a plain white laminate bench and we're really happy with the outcome. The marble subway tiles add that touch of stone and some subtle pattern. 

Outside the kitchen a set of stairs leads you up to the front door and entranceway. The old carpet was ripped up and we chose a beautiful two-tone wool loop pile carpet from Cavalier Bremworth to replace it. It runs from the kitchen stairs up to the entrance floor and the stairs beyond that take you to the master bedroom.

Any available walls are covered in Fi's extensive art collection, which is a perfect way to reflect her eclectic style.

The small wall at the base of the stairs, between the dining room and the hall to the living room was another space we thought we could utilise better. We had Sunshine Joinery build us a really shallow cupboard with bi-fold doors - shallow enough so that it didn't come out into the room too far and block the flow, but deep enough to fit cans and cups and saucers. We haven't got a full photo of the cupboard but you can get an idea of the depth from the photo below where two wooden birds from Homebase Collection perch. You also get a glimpse of the cupboard in the third photo in this post.

Walking in Fi's front door is such a fun experience and starts speaking to you immediately about her personality. After this welcome the kitchen is the first room you see, so we're really pleased with how beautiful it looks, not to mention it's way more functional. Thanks Fi for being such a cool client to work with and allowing us to share our work and your home.